Remember a while ago when Natty said she wanted to fight back against Harlow? She’s found his poacher’s lair and asks me to help her get proof for the constable.
We sneak in. When we’re halfway up the castle, we see a disturbing scene. Highwing has been captured by Harlow’s poachers.
Natty sends me to rescue the hippogriff while she continues to look for Harlow’s incriminating letter.
At the top of the tower I find Highwing and another hippogriff chained to the floor. Natty arrives and breaks the shackles. I climb onto Highwing, but Natty hesitates. She hasn’t bowed to the other hippogriff and it resists her.
In come the poachers. The other hippogriff takes off. Natty runs to jump on its back, but she isn’t fast enough. Highwing spreads her wings and grabs Natty with her talons as she flies.
Poachers shoot curses at us, including Avada Kedavra.
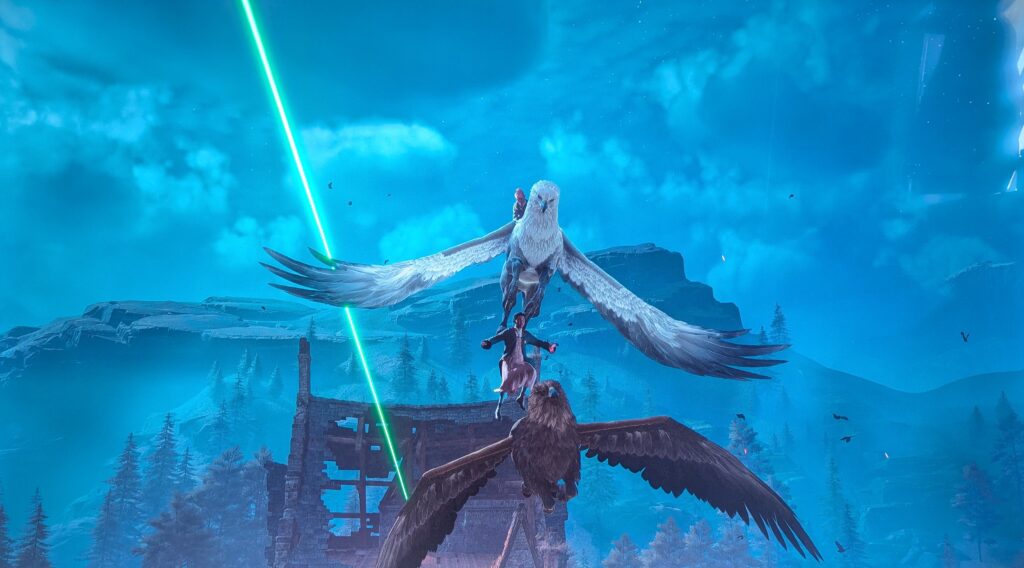
Highwing drops Natty onto the other hippogriff’s back, and we fly away.
(The flight mechanics are the same as for the broom. It’s delightful. Fan service off the charts.)
In the Map Chamber I meet with Fig and the two Keeper portraits. The next trial will be at Rookwood Castle, Charles’ former residence. He doesn’t like what he hears when he visits his portrait there.
I tell him that his descendant, Victor, is a dark wizard. Charles becomes even more urgent that I go right away. A great power is hidden there.
Fig and I, again, can fight together until we reach the door of the trial. I’m on my own after that.
Once sneaking past the outer wall, Fig and I overhear an argument between Ranrok and Victor Rookwood. Victor’s upset about all the goblins digging under his ancestral home. Ranrok seeks stores of magic left behind by the Keepers. (He knows who they are.)
When we’re done eavesdropping, the fighting begins. We need to get into the castle and find Charles’ portrait.
The block wall into the basement is broken. Mining cart ruts lead into a gutted repository. Only a red glowing ground remains. Ranrok has taken this store of magic. Why does he continue to dig here?
Charles is devastated to hear this. He can’t understand how the goblins could know of him and this place. I must perform the trial. Fig disapparates for the Map Chamber, and I enter another encounter with puzzles to solve and stone knights to fight.
After the gargantuan stone knight battle, I enter the room with the Charles statue leaning over a pensieve. The tear from his eye drops his memory into the basin.

The four Keepers visit Isidora in her home. She’s excited and wants to show them something she’s learned on her travels. From the back room, her father, who hasn’t spoken since her brother died, shuffles in. “We have the power to take away pain,” Isidora declares. With her wand she pulls energy from her father’s chest. It’s a blue stream with red bubbles woven in. Rackham immediately jumps up and asks what she’s doing. Isidora takes the energy hovering on the end of her wand and places it in a jar. Her father smiles and says, “Thank you.”
I return to the Map Chamber.
The third portrait is now active. I’m introduced to former Hogwarts headmistress Niamh Fitzgerald. The Keepers would like to continue quickly to the next trial, but Niamh must prepare the way past “a vainglorious and exasperating headmaster”. In the meantime, I’m to continue my studies and hone my magic.
The season advances again, and now Hogwarts is dusted with snow and ice.